Camera Guide: First time setup for App
Christian shows how to add a NEXSMART surveillance camera to the app, and set up the surveillance camera.
QR Code
1 Start by placing the camera close to the router.
2 Reset the camera and wait for it to start saying "Waiting for Wi-Fi Config" or for a LED to light up by the camera lens.
3 In Smart Life, click on the plus in the upper right corner.

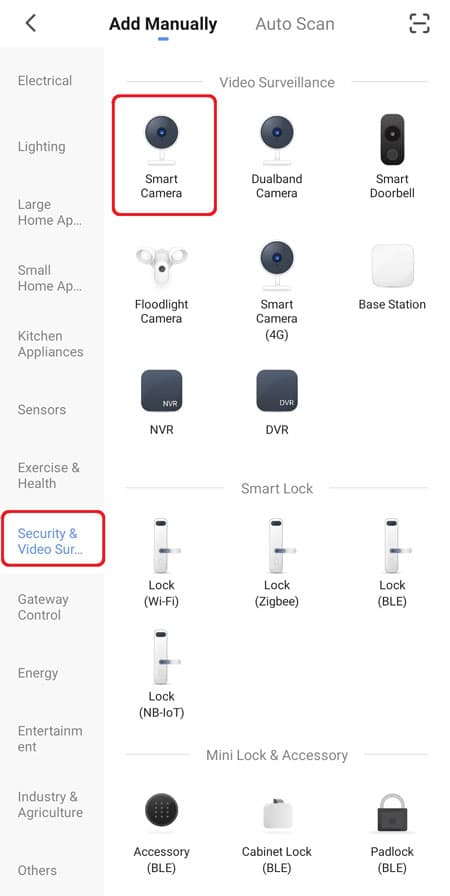
4 Click on "Security & Video Surveillance" and then on "Smart Camera”.
5 Click on "make sure the indicator is flashing…." and then "next".

6 Select your Wi-Fi and enter the password. Press “Next”.

7 When the QR code appears, you scan it with the camera. The phone should be about 20-30 cm in front of the camera lens.
8 The camera makes a new sound when the QR code is scanned, then press "I heard a Prompt".

EZ Mode
1 Start by placing the camera close to the router.
2 Reset the camera and wait for it to start saying "Waiting for Wi-Fi Config" or for a LED to light up by the camera lens.
3 In Smart Life, click on the plus in the upper right corner.
4 Click on "Security & Video Surveillance" and then on "Smart Camera”.

5 Press “QR Code” in the upper right corner and then select “EZ Mode”.

6 Select your Wi-Fi and enter the password. Press “Next”.

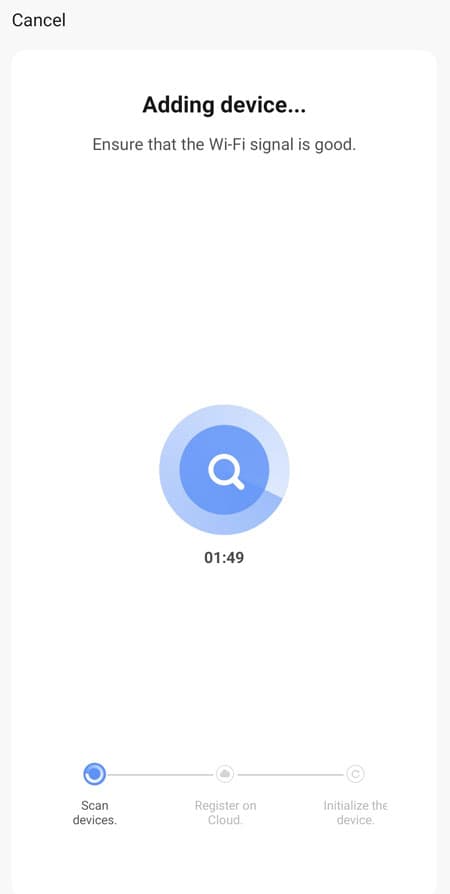
7 The app will now search for the camera and when it is found, press “Done”.

Cable
1 Connect the camera to the router with a network cable.
2 Reset the camera and wait for it to start saying "Waiting for Wi-Fi Config" or for a LED to light up by the camera lens.
3 In Smart Life, click on the plus in the upper right corner.
4 Click on "Security & Video Surveillance" and then on "Smart Camera”.

5 Click on ”QR code" and switch to ”Cable”.

6 Click on ”Power on the device and make sure the indicator is flashing....”. The app will start by searching for the devices.
7 Once the camera is found on the network, select it in order to add it to the app.

8 After a moment, the App will have added the camera.
POE
1 Connect the power cable to the POE-INJECTOR
2 Connect a network cable from “DATA IN” directly to your router.
3 Connect a network cable from “DATA POWER OUT” to the camera.

4 Reset the camera and wait for it to start saying "Waiting for Wi-Fi Config" or for a LED to light up by the camera lens.
5 In Smart Life, click on the plus in the upper right corner.
6 Click on "Security & Video Surveillance" and then on "Smart Camera”.
7 Click on ”QR code" and switch to ”Cable”.
8 Click on ”Power on the device and make sure the indicator is flashing....”. The app will start by searching for the devices.
9 Once the camera is found on the network, select it in order to add it to the app.
10 After a moment, the App will have added the camera.